


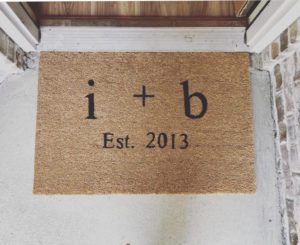
The seasons are a changin’, which means a new reason to decorate! If your front porch has been feeling a little drab lately, turn it into FAB with this fun DIY welcome mat!
Materials ::
")
")
- Plain welcome mat: I got mine from Ikea, but you can also find them at Target!
- Paint: I picked up a regular black acrylic paint at Michael’s, since my front porch is covered from the elements. If your welcome mat meets rain, make sure to pick up a more durable paint.
- Exacto knife: This knife can be found in any superstore or specialty store such as Michael’s.
- Paint brushes or sponges: Depending on how intricate your deign is, you’ll want either a sponge or a brush. I chose a brush since I was working with smaller line work.
- Durable surface: I used some cardboard from a purchase I made earlier in the week, but any solid surface you don’t mind scratching up will do.
- Stencil: You can choose to make your own stencil or buy one in the store. If you choose to buy a stencil in store, you won’t need to purchase an exacto knife or a durable surface.
Making the Stencil ::
If you decide to make your own stencil, there are MANY ways to make one, but I chose the cheapest and easiest way because, well . . . I’m cheap and I’m lazy.
The first thing you’ll want to do is find a font you like. I used the website FontSpace and chose the “Sweet Hipster” font. The great thing about this website is you can type exactly what you want in the font of your choosing, then copy and paste it into a Word document! So simple. So easy!
Once you have your font and design, it’s time to print your pattern! You can use plain printer paper (like I did) or get a thicker paper like card stock. After printing your pattern, it’s time to cut.
")
")
Next Steps ::
- Taking your pattern and knife, create your stencil by carefully cutting out the design on top of your durable surface. This step will take the longest, so make sure you have a safe, kid-free zone to work in. If you have older children, ask them to help you — or they can make one too!
- Place the stencils down on your mat however you like. Remember to keep the distance in mind between the stencils when placing your design.
- Once you’ve gotten your layout juuuuuust right, it’s time to paint!
- Grab your sponges and paint, and use a blotting motion to completely fill in your stencil. The mat will absorb the paint at first, so don’t be afraid to use a lot.
That’s It! You’re Done!
Dry time will depend on which type of paint you use, but you can expect your mat to be dry and ready to use after one to two hours!
If you try this DIY welcome mat, let us know and show them to us!
Have fun creating!


 :: The Treasure Box")


