


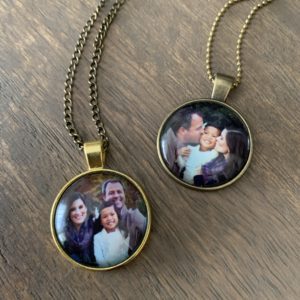
These little necklaces started as an idea to connect with my daughter as she was beginning preschool. I wanted a way for her to feel close to me while we were apart. We promised each other we’d wear ours daily and give them kisses or squeeze them in our hand (for a hug) whenever we missed one another.
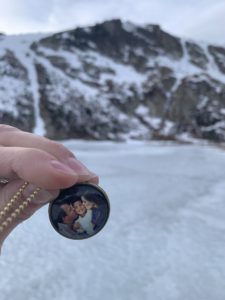
What began as a special way to ease her into 4K, has turned into a craft that connects our hearts during other times, too! I recently went to Colorado on a retreat, and my little love was having a really hard time with me being gone. She was excited when I pulled out our “family necklaces” before I left! We talked about how they were magic and how they’d deliver our hugs and kisses throughout the weekend. Then I texted her photos (via her Papa) of my necklace in all the places I was (on the airplane, on the top of a mountain, out in the snow) with a message that I was sending her kisses and hugs!
As we prepare for Christmas, I am planning to make a few more of these necklaces for her grandmothers. (Shhh! Don’t tell Yaai & Tutu!) This could be a great gift idea for family members (especially those who live far away), a simple way to make custom “best friend” necklaces for your kids, or even used as a key chain for those who don’t like necklaces. (A key chain could be attached to your child’s backpack, too!)
My daughter has a pendant with our family on it, and another with her (long distance) best friend’s photo. This would make a really thoughtful gift for a mom waiting on a child via international adoption (if they have a photo to use). A necklace could also be created to remember a loved one who has passed away (for an adult or a child.) The pendants come in sets of 10-12, so one afternoon of crafting could create so many special gifts!
Here’s what you’ll need:
- Pendants
- Diamond Glaze glue
- Scissors or 1″ hole punch
- Favorite digital photos
- Key chains or necklace chains
Step 1: Order the pendants and glue. These can be at your door in two days, thanks to the wonder of Amazon Prime! You can also buy a 1″ hole punch if you want to make this even easier on yourself.
Step 2: Choose key chains, necklaces, or any other creative attachment for the finished pendants. You could also buy these off Amazon, but I found that I like to take a trip to the local craft store to find just the right ones (and make sure they match the pendants once they arrive!)
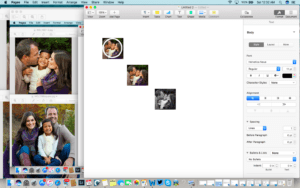
Step 3: Choose your favorite photos, and paste them into a Windows or Pages document. (I used Pages on my Mac.) They don’t have to be high resolution because you’re printing them so tiny. Use the “add a shape” insert option to add a circle on your page. Resize it to be 1 inch around. Then click on the “arrange” button to “bring it to front” so it will lay over your image, and change the color of the outline to be lighter and easier to see when it’s over your image.

Now add your image to the page, and resize it so that the circle fits exactly over what you want in your necklace. This will insure that it prints in the correct size!
You may want to copy and paste a few of these, so that if you cut it incorrectly you have a backup. You might also try them in color and black and white – to see which you prefer once they’re printed! Once you have the images the correct size, delete the “circle” off the top of them, save the file, and head to your closest Office Depot.
Step 4: Print your photos at an office supply store. I have found that this is the easiest and cheapest way to print this page. Just take it to your closest office store (I use Office Depot) and have them print it on an 8.5 x 11 piece of photo paper. Printing them on our home printer and photo paper made the ink run. You’ll want them done professionally. You can print an entire page full of options at once this way, too!
Step 5: Head home and get out your sharpest scissors or your 1″ hole punch. Cut out the little circles, and experiment with them in your pendants. See which ones you like the most once they’re in place!
Step 7: Put in the photo you’ve chosen, add a drop or two of the Diamond Glaze, and press in the glass dome. Make sure there are no bubbles. Wipe off any excess glaze with a damp cloth. Let the necklaces dry overnight.
Step 7: Add a key chain or necklace to your pendant, and your gift is ready!

This craft is easy, inexpensive, and has so many possibilities. If you have a tween or teen, this is a craft that they can do right along with you (or even do by themselves!) For a smaller child, you could have them help you choose the pendant colors and photos, drop in the (cut) picture, and even help you with the glue. Don’t worry if you get too much! It’s water soluble and can be wiped off with a damp cloth . . . but somehow it stands the test of time (my daughter’s necklace survived a trip through the washing machine!)
Happy crafting, Friends! I hope you have fun making these necklaces, and I really hope they help connect your child’s heart to the ones they love!


